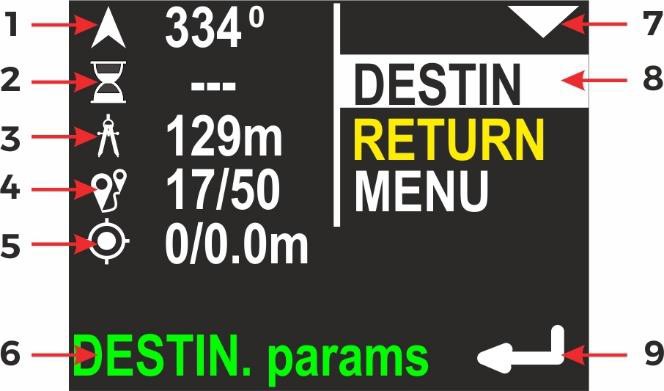
After pressing the top button on the main navigation screen, the display content changes like shown above.
On the left side of the screen, all present information are shown. On the right side there is a list with all available options. The currently selected item is marked by inverting the background and foreground color (highlighting).
In the picture above, first item (DESTIN) is selected, so left part of the display is filled with information connected to actual destination parameters:
- Course to the programmed destination
- Time left to destination (approx.), if can be calculated
- Distance left to destination
- Current record number in memory / maximum available records
- GPS information: available satellites count / horizontal precision
- Operation hint – when you press the lower button, you will be redirected to the screen with DESTINATION parameters
- Top button role – go to the next (lower) item
- Currently selected item
- Bottom button role – enter/choose the selected item
Button roles
Top button
Select the NEXT item. After 3rd press, you will return to the main navigation screen.
Bottom button
ENTER to activate the selected item.
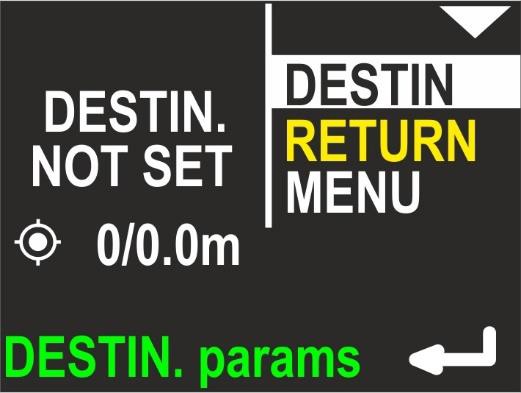
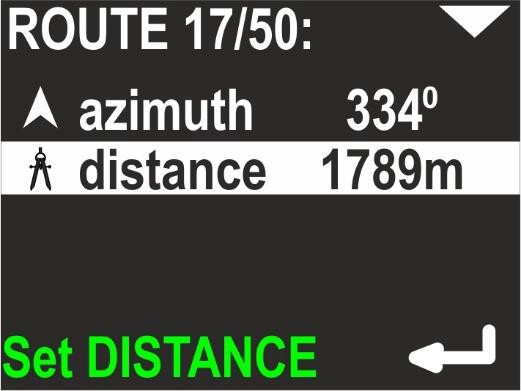
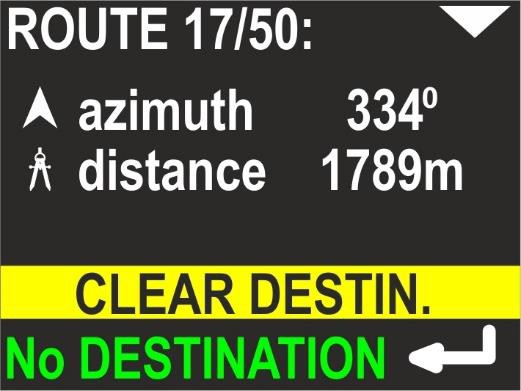
Destination parameters – setting and changing
When you activate the DESTIN(ation) option on the additional information screen (see above), the device will show the current destination parameters (if set) or it will suggest new ones, as shown in the following picture:
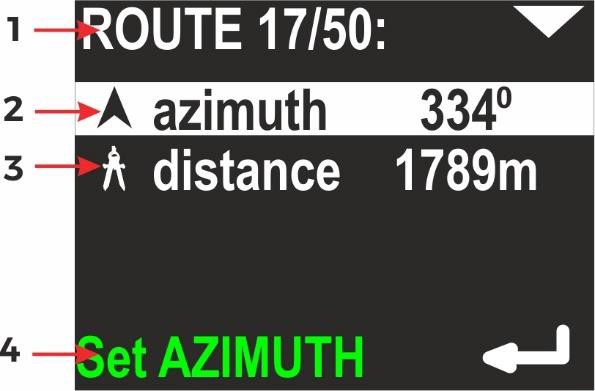
- Current route number in memory / total routes in memory
- Azimuth – planned course (including deviation)
- Distance – The distance to the planned destination
- Operation hint – When you press the lower button, AZIMUTH can be modified.
If you press the lower button (ENTER) when azimuth is selected, the display will change
like this:
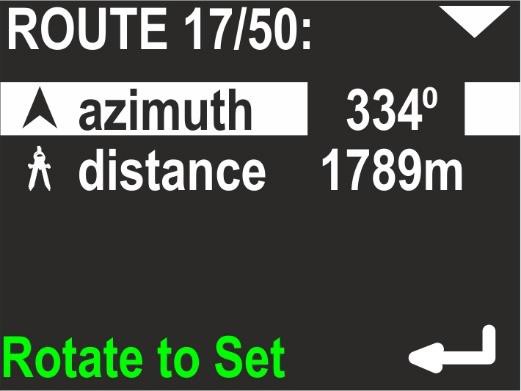
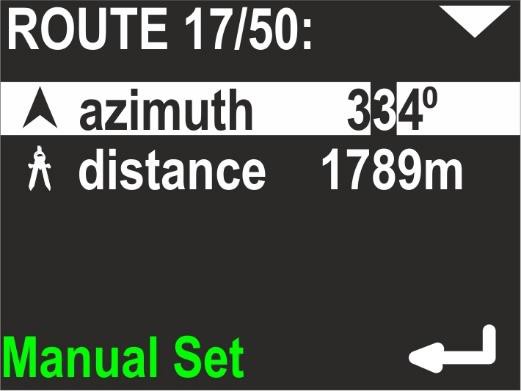
You may now rotate the device, in order to set the desired heading. Then simply press the lower button (ENTER), if the value is appropriate. You may also press the upper button now. This will allow you to set the desired azimuth manually digit by digit (use the lower button to change the value).
Next, set the distance – you may do it when the second line is highlighted:
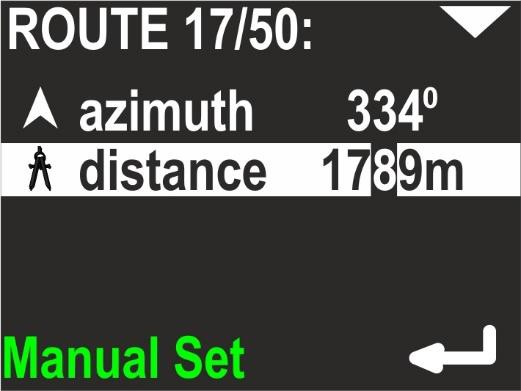
Distance value is changed also digit by digit. Pressing the top button switches to the next position, the bottom button changes the value.
RETURN
If the RETURN item is selected, the screen looks like below:
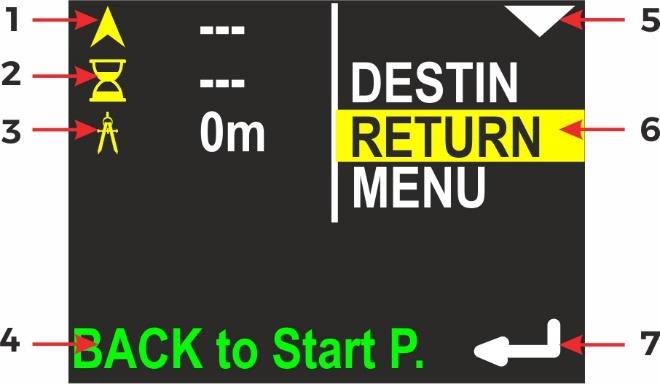
- The course you need to follow in order to return to the start point.
- The time required to return to the start point (approx.).
- The distance from current location to the start point.
- Operation hint – when you press the lower button, the device will guide you back to the start point.
- Top button role – go to next (lower) item.
- Currently selected item.
- Bottom button role – enter/activate the selected item.
Button roles
Top button
Select the NEXT item (MENU).
Bottom button
Switch the device from navigating to DESTINATION to navigating back to the START POINT.
MENU
If the MENU item is selected, the screen looks like this:
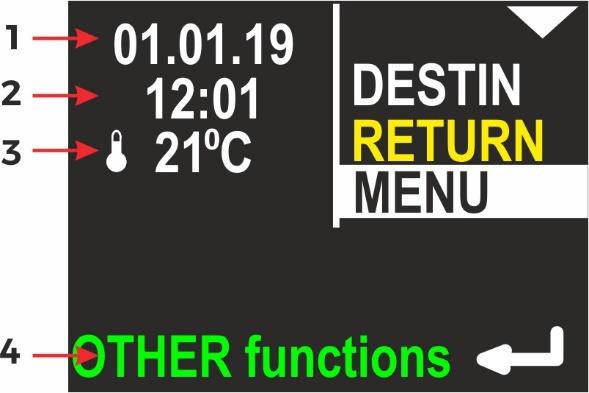

- Internal date (DD.MM.YY)
- Internal time (hh:mm), in 24-hour system
- Water temperature
- Operation hint – when you press the lower button, other functions will be shown.
- Stopwatch