Document information
| Document level: | Level 0 |
| Scooter models: | All FUTURE / GHOST models |
| Document date: | April 2, 2020 |
Procedure information
| Time to complete this procedure: 5 min | |
| Tools needed to complete this procedure: – Cotton swap – New display foil – 2 new rubber buttons – Place free from dust and air movement |
Step-by-step instructions
Introduction
The display protection foil and the rubber buttons can be easily exchanged.
Removing the display foil and the rubber buttons
Before starting, it is recommended to evaluate the polycarbonate panel for damages. Take care especially for edges/ screws surrounding areas. In case of detected damages- consider replacing the whole front polycarbonate panel.
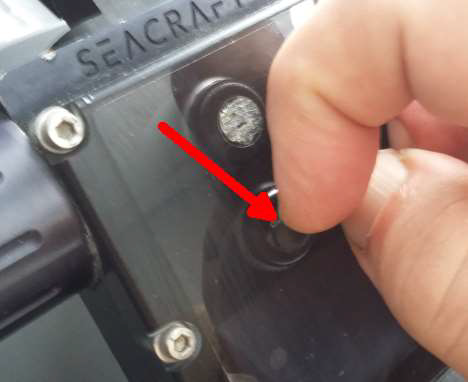
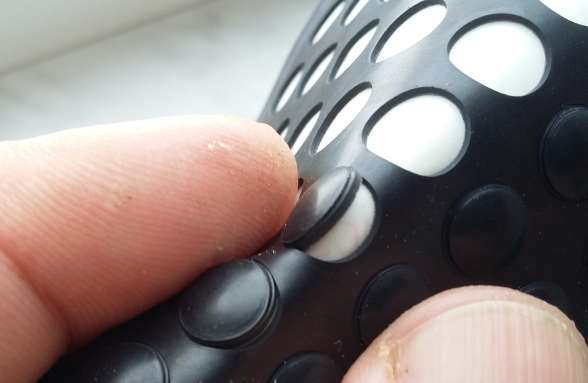
Remove rubber buttons. Do not use any sharp object (knife etc.), just your fingernails.
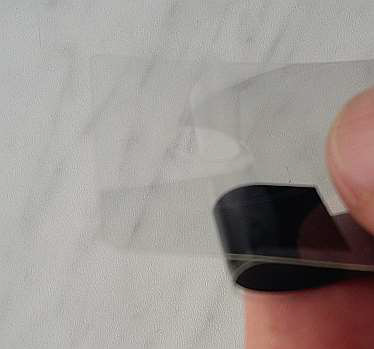
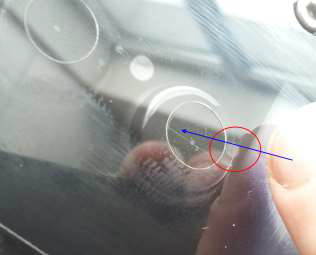
Remove old (broken) cover foil. Start with any corner:

Cleaning the display
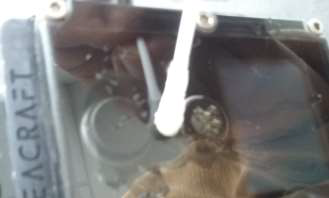
Remove glue remains by means of a cotton swab soaked in isopropyl alcohol
(Kontakt IPA etc.).
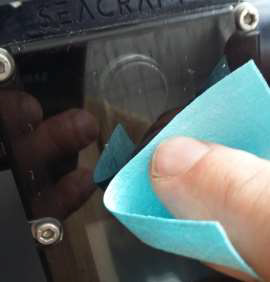
Wipe the whole display surface with a soft cloth or a special towel.
The surface must be clean and dry, before the next step. No dust or fibers allowed!
This should be done in a clean room, without dust, and air movement. One of the possible methods to eliminate dust particles from air, is boiling the water in vicinity of work area. 2-3 min afterwards, when air movement stops- it should be cleaned from surrounding dust particles.
Placing the new foil and rubber buttons
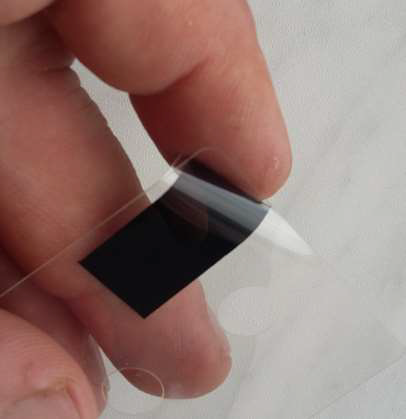
Bend down a small part of the new display foil as illustrated below.
Do not touch the bottom surface of the foil with your fingers.
 |  |
Make sure the display glass is still clean and dry.
Place a part of the foil on the top part of the display glass as illustrated below:
WRONG!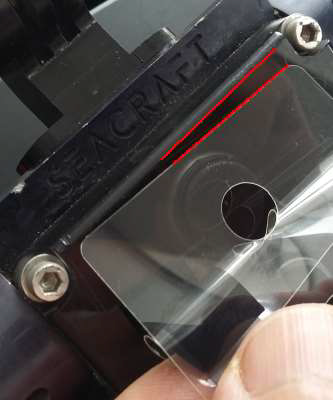 | CORRECT!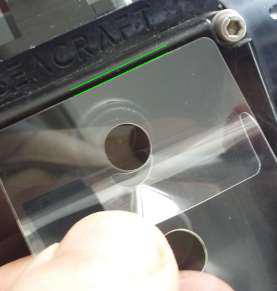 |
Move down, and press the foil to the glass with your fingers:
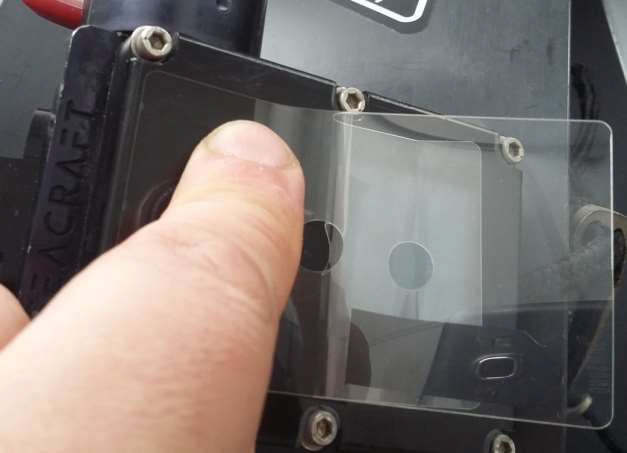
Should some air bubbles remain, remove it by moving you finger over it, pushing it to the nearest edge:
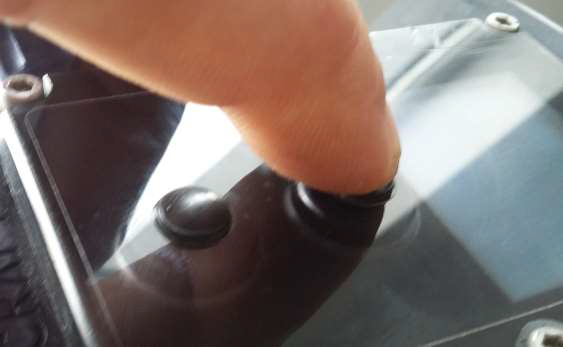
Remove a new rubber button from the carrier foil, and press it to the right spot on the display. Then, repeat this step for the second button.
In case of questions or problems,
do not hesitate to contact us: service@seacraft.eu.