Preparation for use
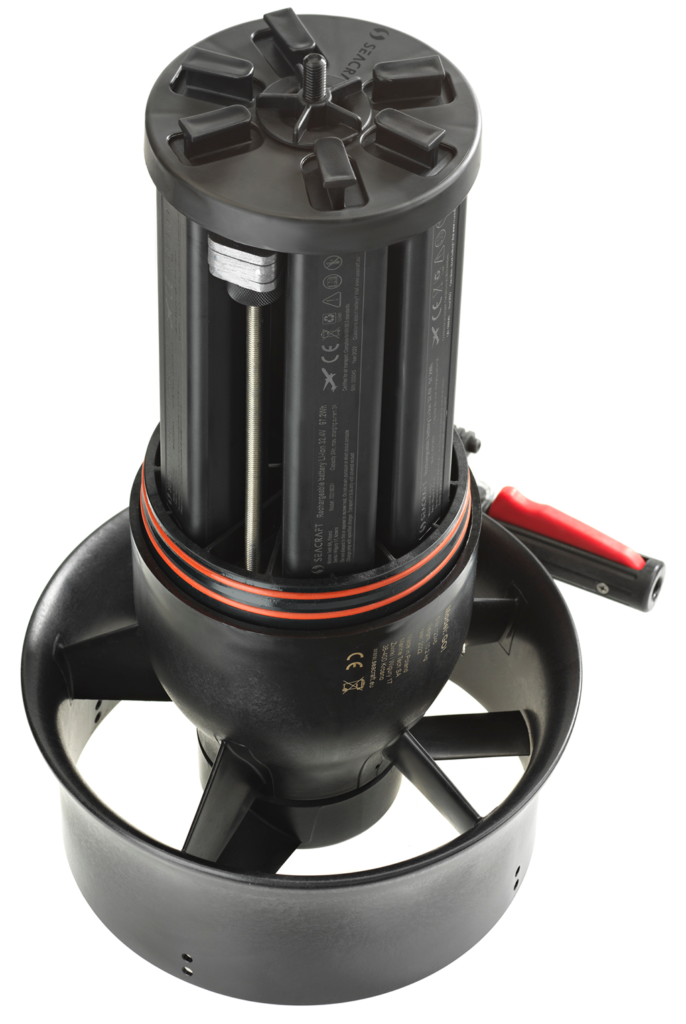
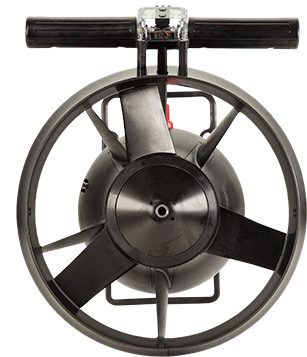
The scooter is composed of two main elements (→ Components):
- The cylindrical part, in which battery and ballast are located.
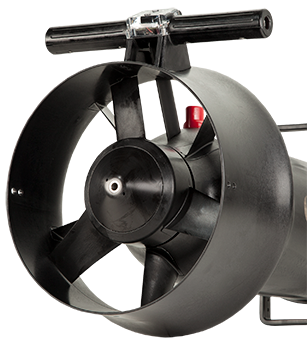
- The drive unit comprising a body with a motor and an propeller and nozzle with the steering handle.
Opening the scooter
The GO! was developed in a way, that it only has to be opened to change the trim or to remove / install battery segments. During normal operation, it may stay shut. If you need to open the scooter, proceed as follows:
- Place the scooter on a flat, stable and clean surface.
- Loosen and remove the cap nut.
Please note, that for loosening the cap nut – while it should have been tightened by hand only – you might need the Seacraft service key. The reason is, that drying grease and sediments over time may cause the cap nut to be more tight than right after closing the scooter.

- Hold down the drive unit by pressing down the nozzle edge with one hand or leg (not the steering handles). With the other hand, pull up the housing cover by the transport handle, while at the same time “wiggling” it in all directions.
Trimming the scooter
The GO! provides a unique continuous trimming system, that allows for a very precise trim.
In combination with the scooter‘s battery segments, the trimming system also serves as a „keel“, making sure that the scooter‘s steering handles underwater will always point upwards.
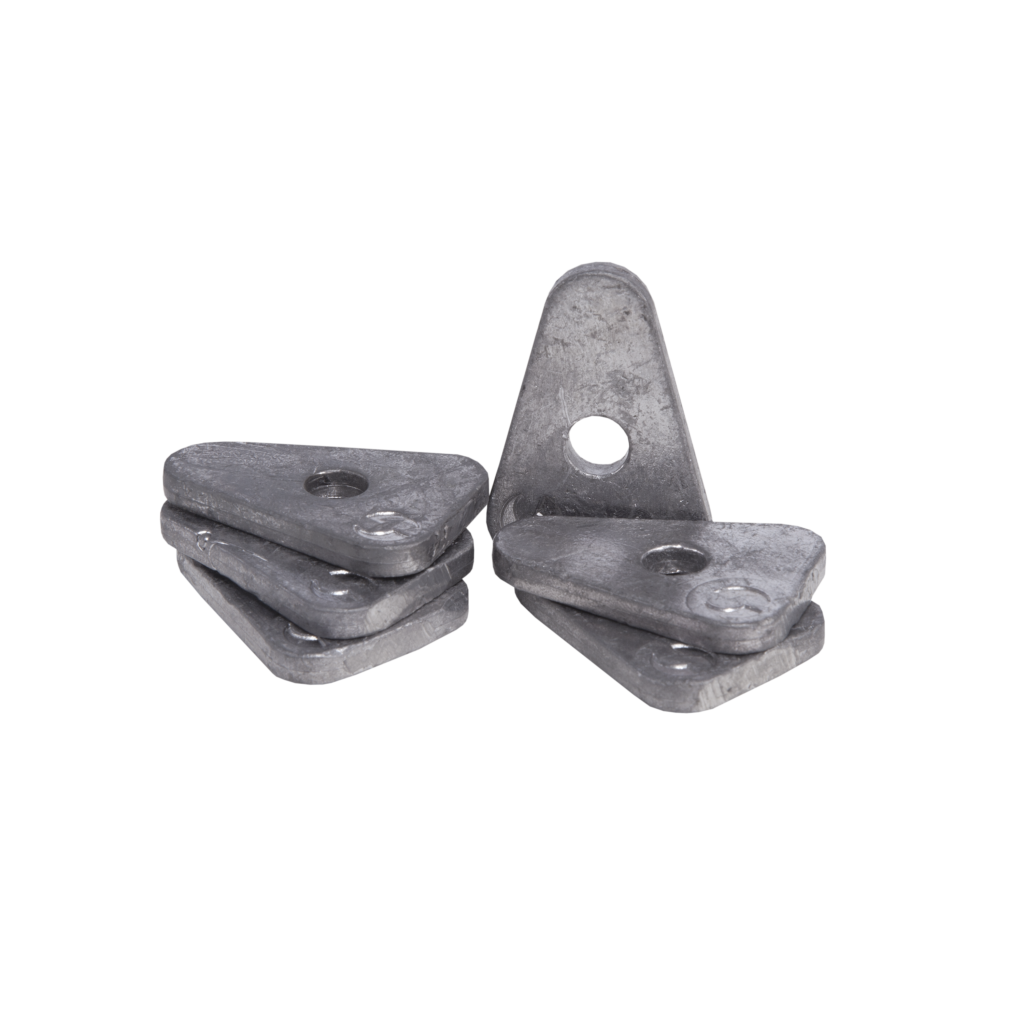
The GO! scope of delivery encompasses some additional trim weights, so the scooter may also be trimmed for salt water.
Trimming the GO! is quite easy:
Open the scooter (see “Opening the scooter” above).
- Loosen and remove the battery segment fixation nut.
- Remove the battery segment fixation ring.
- Define the required amount of trim weights depending on the water salinity and your scooter configuration.
- Place the required number of trim weights on the trim weight rod.
- Move the trim weights back or forth by adjusting the front and rear setting screws.
Like this, you will make the scooter‘s nose point more downwards/upwards.
Depending on the salinity of the water, you will use the GO! in and on the accessory installed on the scooter, try to make the scooter swim level. If needed, add or remove one or more trim weights.
- Place the battery segment fixation ring properly onto the battery segments.
- Tighten the battery segment fixation lock (hand-tight).
- Close the scooter (see “Closing the scooter” below).
Closing the scooter
- Check/clean the 3 o-rings on the drive unit, and slightly lubricate them with silicone grease provided by the manufacturer.
- Check/clean the sealing area inside the housing lid and on its lower edge.
Slightly lubricate these areas with silicone grease provided by the manufacturer.

- Hold the housing lid over the scooter and align both components.
- The top of the transport bracket must be parallel to the steering handles.
- Slowly lower the housing lid down to the driving unit.
- Check the alignment one more time, then use reasonable force to press the housing lid onto the drive unit.
- Make sure, that the housing lid correctly slides over the 3 o-rings on the drive unit, and that the housing lid is flush with the drive unit.
- Check/clean the 3 o-rings on the cap nut, and slightly lubricate them with silicone grease provided by the manufacturer.
- Insert the cap nut into the opening on top of the housing lid, and slightly press it down, until you feel the cap nut touching the center rod inside the scooter.
- Pressing it slightly downwards (in order to avoid damaging the first threading winding), tighten the cap nut firmly by hand until the point of resistance.
- Do NOT use any tools to tighten the cap nut. This may lead to damages to the scooter.
Battery handling
For information about installing, removing, charging and transporting the battery segments, → Charging the battery.
Installing the harnesses
Assembling and installing the scooter harness
The scooter harness, consists of 1,8 m solid line, a bolt snap carabiner and 2 tensioners. It is supposed to link the diver via his/her crotch belt d-ring with the scooter’s nozzle. Like this, there will be no fatigue because the diver does not have to endure any pulling forces on his hands and arms.

Since the harness is delivered in parts, assemble it as shown in the above image.
Proceed as follows, to assemble the harness:
- Pass the line through the boltsnap’s eye.
- Now, pass the line through the upper opening of a tensioner, behind the back of the fastener and through its lower opening.
- To fix this line end, guide the line through the left-right or up-down fastening holes on the edge of the scooter’s nozzle.

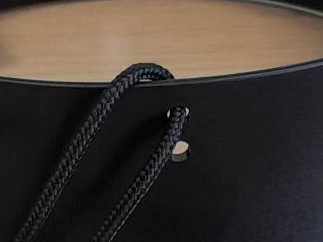
- To close the harness loop, pass the line end through second lower opening in the fastener, and make a knot.
- Repeat these steps with the other line end, and be sure to pass it through the opposite fastening hole located on the edge of the nozzle.
- Now, use the tensioners to adjust the length of the scooter harness.
- The harness should be adjusted before diving according to the user’s preferences.
- The manufacturer’s original tensioner’s shape allows easy adjustment of the harness length even by a diver wearing thick gloves.
Assembling and installing the nose harness
Seacraft offers a second optional harness to be attached to the scooter’s nose.
This harness facilitates towing and securing the scooter, when it is not needed under water.

Proceed as follows, to fix this harness to the scooter’s nose:
- Locate the fastening openings in the scooter’s nose.
- For more stability while towing, it is recommended to pass one harness line end through the upper openimg, and the other harness line end through the lower opening.
Let the harness line ends be long enough to allow for removing the cap nut, and tighten each harness line end with a stable knot to the scooter.
Removing the propeller
In certain cases (e.g. an entangled line or for maintanence), the user will need to remove the propeller from the scooter, if the problem cannot be solved by activating the reverse gear. Since the scooter’s propeller is held on the engine by magnetic forces, there are no tools needed to remove it – even underwater.
Proceed as follows to remove the propeller:
- Firmly grab the propeller with both hands hand, so that your fingers are positioned between the propeller blades.
- Let another person hold the scooter at the steering handles, while you pull off the propeller. Be aware, that there will be a sudden “jolt”, when you have overcome the magnetic forces holding the propeller in place.
Maintaining the propeller and the static engine part
The scooter’s engine needs very little maintenance.
Proceed as follows to make sure, it will always function properly:
- Regularly (e.g. before each dive) check the inside of the moving engine part for contamination and damages.
- Especially after diving in silty environments or in salt water, rinse the inside of the moving engine part with clean sweetwater, and wipe dry the surfaces with a soft and clean cloth.
- Make sure, the little openings on the back of the propeller ring are not clogged.
- If there is no or very little engine grease visible, slightly lubricate the little ball on the propeller axle and the axle itself with the provided Seacraft engine grease.
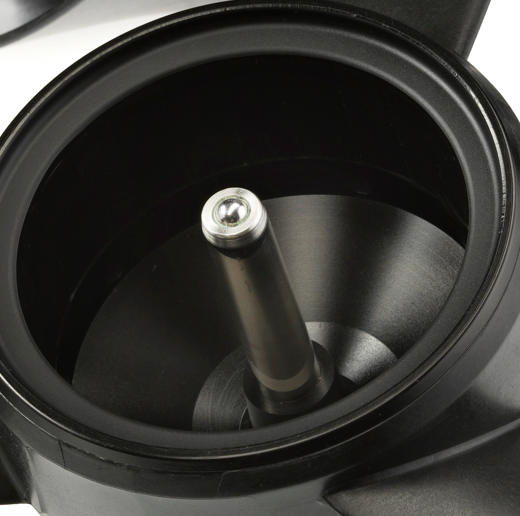
- Regularly (e.g. before each dive) check the fixed engine part for contamination and damages.
- Especially after diving in silty environments or in salt water, remove the propeller, rinse all parts with clear fresh water, and let them dry disassembled.
Installing the propeller
Since the scooter’s propeller is held on the engine by magnetic forces, there are no tools needed to install it – even underwater.
Proceed as follows to install the propeller:
- Firmly grab the propeller with one hand, so that your fingers are positioned between the propeller blades.
- With your other hand, push against the middle of the scooter’s steering handle, and let the propeller slide onto the fixed engine part. Be aware, that there will be a sudden “jolt”, when the magnetic forces pull the propeller into place.
Should you not be able to place the propeller with one hand, ask another person to assist you by holding the scooter for you. In this case, grab the propeller firmly with both hands, so that your fingers are positioned between the propeller blades.
Operating the scooter
This section contains useful operation on the following topics:
- Preparing the scooter for use
- Control elements
- Setting the control mode
- Entering the water with the scooter
- Using the scooter under water
- Leaving the water with the scooter
Before the first dive using the scooter it is essential to read the instructions carefully and learn about the scooter operation – turning on and off, control of gear changes, modus change and error codes displayed.
Before entering the water with the scooter, make sure it is working properly and that the battery is charged.
Preparing the scooter for use
Before you actually use the scooter, make sure you have completed the following steps:
- The scooter’s battery has been charged to a safe level for the planned dive
(→ Charging the battery). - The scooter has been closed properly, see “Closing the scooter” above.
- The scooter harness(es) has / have been installed and set, see “Installing the harnesses” above.
- The scooter has been checked and is ready for diving.
Control elements
You need to be familiar with the following 3 control elements to operate the scooter:
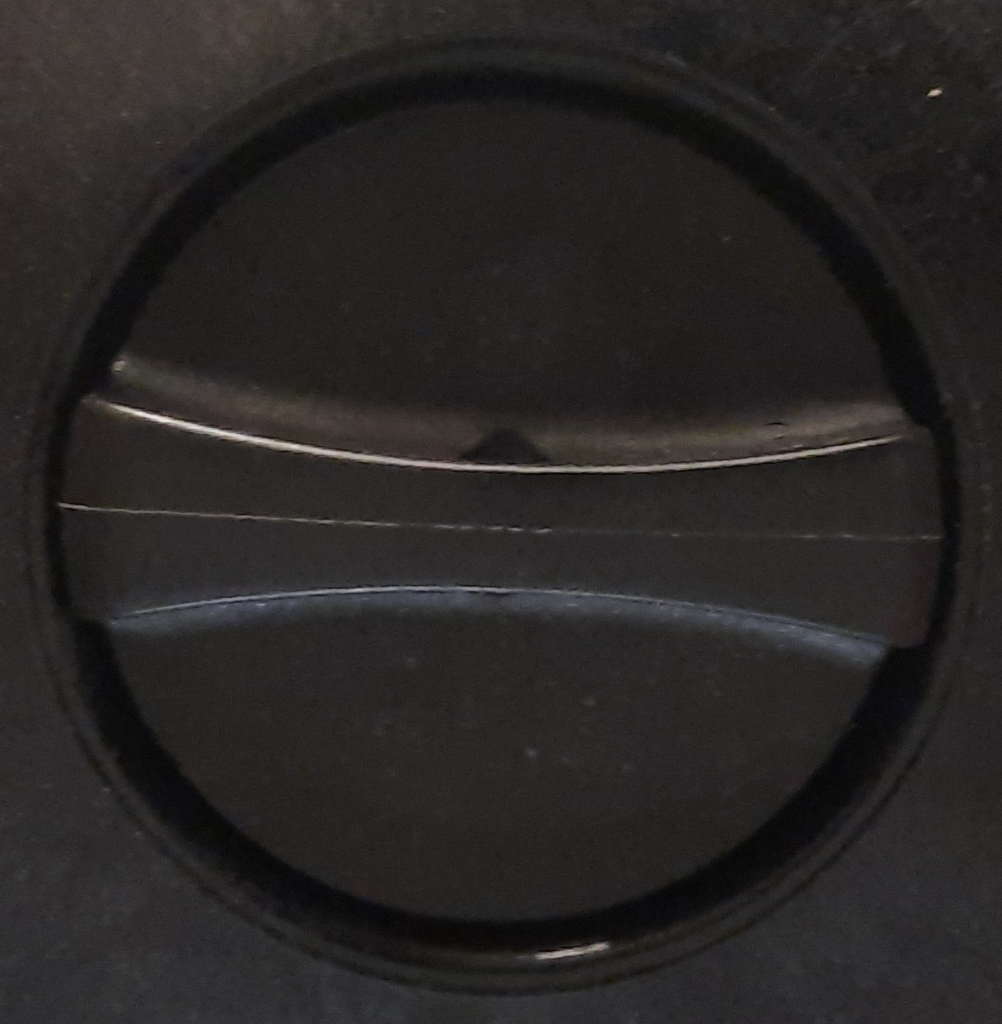
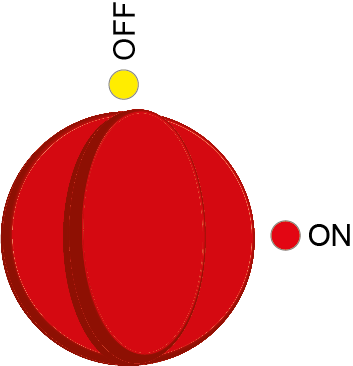
Main switch
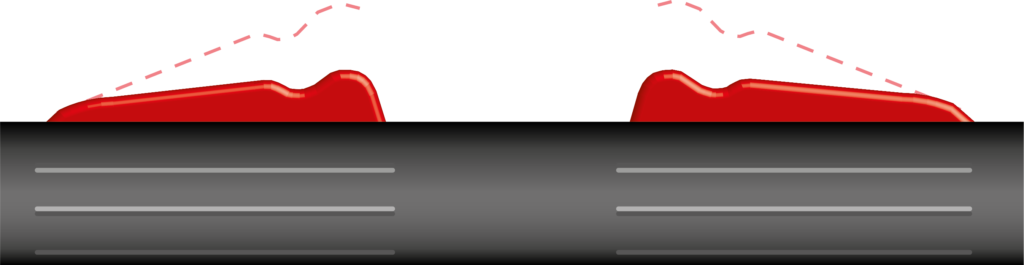
The main switch is located on the upperside of the housing lid, directly in front of the steering handles. To switch on the scooter, turn the main switch in any direction until it is perpendicular to the direction of travel:

To switch off the scooter, turn the main switch in any direction until it is in the direction of travel:
Control triggers
The control triggers are integrated in the steering handles.
There is a left and a right control trigger:
Depending on the selected control mode, you will need to press only one or both control triggers to activate the scooter engine or (during mode setting) to return to driving mode.
Driving the scooter with one hand in Expert and Freediving mode, you may also perform a “double click” with the unused control trigger to do the following:
- When in gear 1-7, accelerate to full speed
- When in gear 1-2 in Freediving mode, accelerate to full speed
- When at full speed, decelerate to the last used gear
- After the gear was automatically reset to 0, accelerate to the last used gear
Display with control buttons
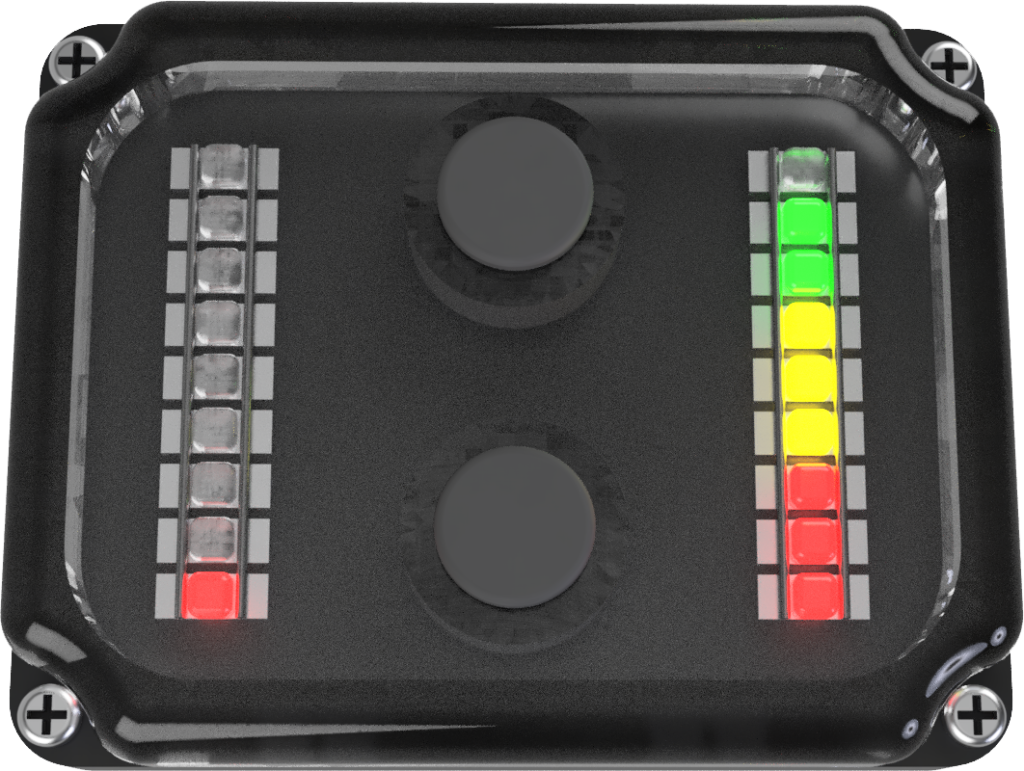
The scooter’s display is located on the steering handles and looks like this:
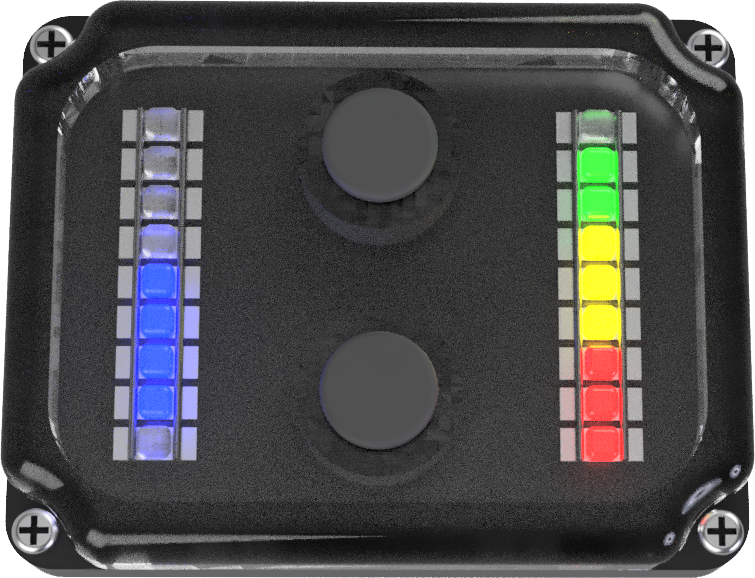
- The LEDs on the right side of the display show the current battery charging level or (during mode setting) the currently selected control mode.
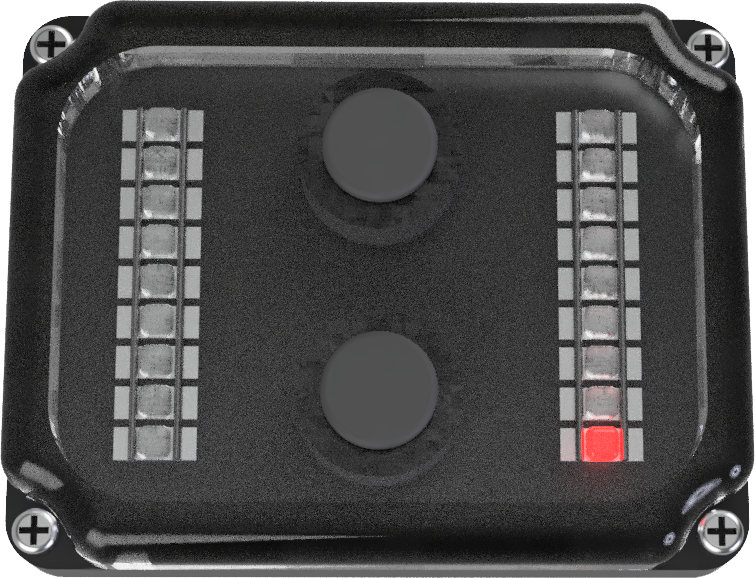
- The LEDs on the left side of the display show the currently selected gear (reverse, 0, or 1-9) or an error code (blinking red LED in the bottom left).
- Press the upper and lower piezoelectric control button in the middle of the display, to select a gear or (during mode setting) to select the control mode.
Control mode
The GO! is a versatile companion for recreational, technical and free divers alike, because Seacraft has integrated 3 different control modes, that offer targeted functionality for these groups of divers.
Proceed as follows to set the control mode:
- Turn the main switch, until it is perpendicular to the direction of travel –
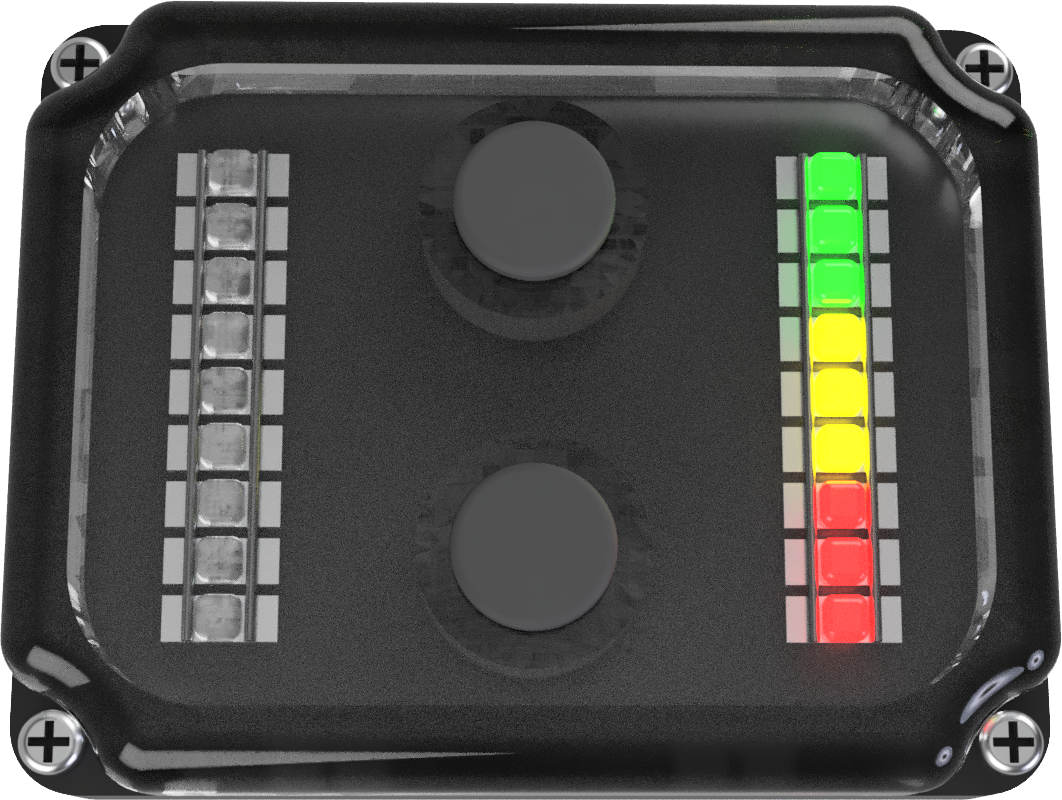
the Display LEDs will be off. - Hold both control triggers pressed, and switch on the scooter
(turn the main switch in any direction, until it is in the direction of travel – the display LEDs will shortly “flash”, and the charging level will be displayed). - When the red, yellow or green LEDs on the right side of the display light up, release the control triggers.
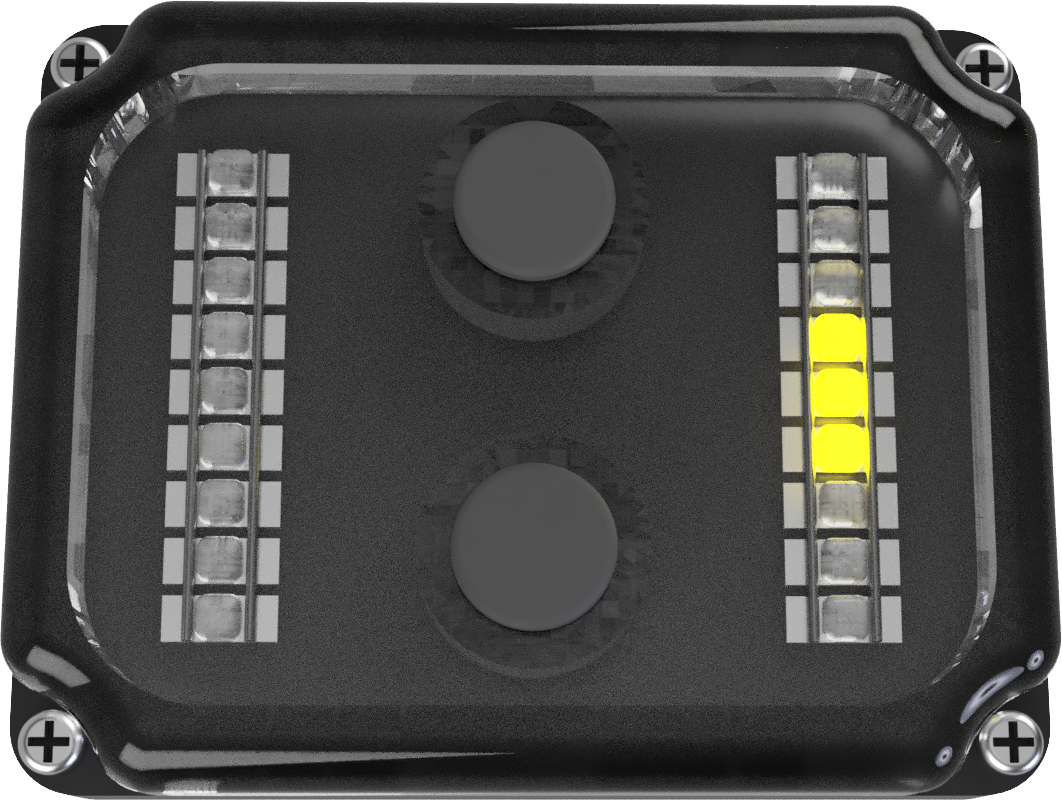
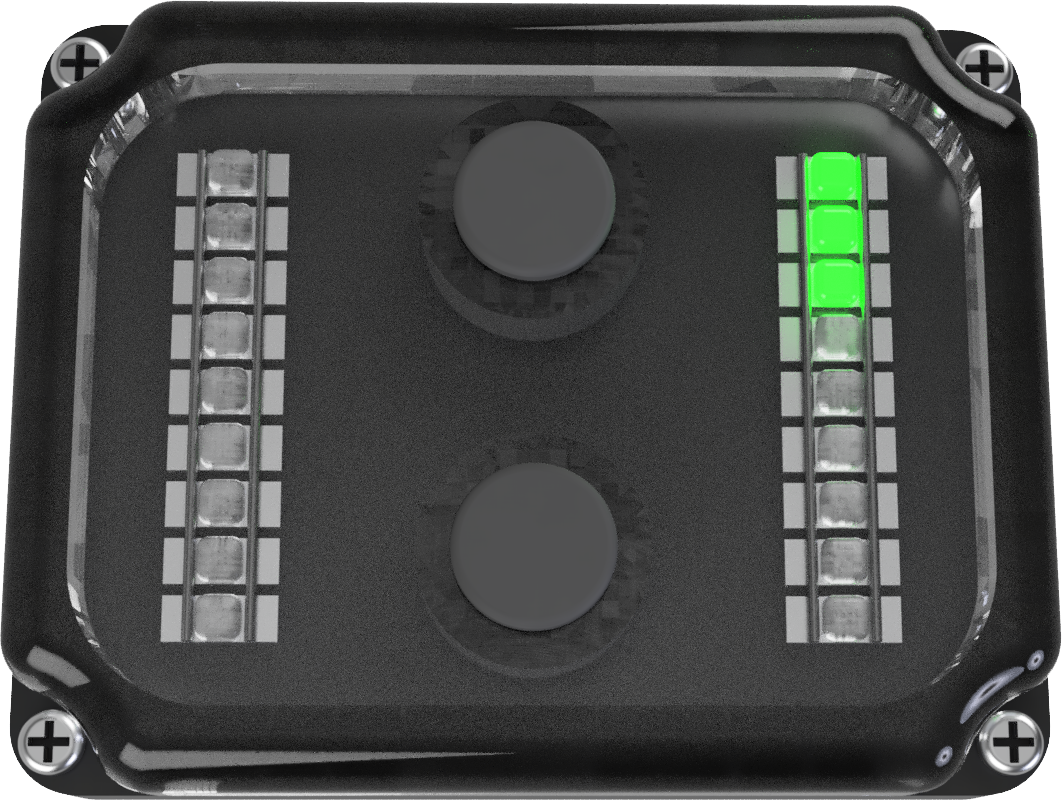
- Press the upper or lower display button, to select the desired control mode
(Recreational [Yellow], Expert [Red] or Freediving [Green]).
Please note, that the GO! offers some special features (see further below), which may be activated or deactivated depending on the selected control mode:
- Time Lock feature
- Double click
- Bypass
In the following table, the 3 different control modes are explained.
 | Recreational mode (yellow LEDs are lit) – The scooter must be controlled with both hands – 8 forward gears + reverse gear eavailable – After switching the scooter on, gear 0 is selected. |
 | Expert mode (red LEDs are lit) – The scooter may be controlled with left or right hand – 8 forward gears + reverse gear available – After switching the scooter on, gear 4 is selected. – After approx. 10 seconds of inactivity, the scooter is automatically set to gear 0 (Time Lock). – With a „double click“ on the free control trigger, the user may accelerate to full speed and then again decelerate to the previously used gear („Catch-up“ feature) – If the scooter is in gear 0, with a „double click“ on the left or right control trigger, the user may accelerate to the previously used gear (if the scooter has not been switched off in the meantime). – In the event of a display malfunction, the scooter engine is started automatically in gear 4 (Emergency Bypass), so the scooter will bring you home, even if the display cannot be used. |
 | Freediving mode (green LEDs are lit) – The scooter may be controlled with left or right hand – 3 forward gears available – After switching the scooter on, gear 8 is selected. – By pressing the upper and lower button, the user may select between slow, medium and full speed. – With a „double click“ on the free control trigger, the user may accelerate to full speed for an emergency ascend. – In the event of a display malfunction, the scooter engine is started automatically in gear 4 (Emergency Bypass), so the scooter will bring you home, even if the display cannot be used. |
- After having selected the desired control mode, briefly press one of the control triggers, to switch the scooter into diving mode.
- If you are checking the scooter before a dive, now test the scooter by selecting a gear by means of the control buttons, and pressing one or both control triggers. Otherwise, switch off the scooter.
Entering the water with the scooter
The method of entering the water with the scooter should be adapted to the individual skills and abilities of each diver, using one of the following safe procedures (according to situation):
- The scooter is placed in the water, the diver enters the water.
- The diver enters the water, the scooter is given to the diver by a third party.
When you are in the water with the scooter, secure it by clipping the scooter harness bolt snap to your crotch belt d-ring.
Using the scooter underwater
General
Your Seacraft scooter will allow you to move much faster than a diver without a scooter, and it will give you considerably more range. Apart from that, a Seacraft scooter runs very silent.
Please keep in mind these factors when planning your dive and while diving.
Start your dive, and descend to the planned depth, then switch on the scooter.
You may switch on / off the scooter or enter the mode setting at any time during your dive.
Selecting a gear
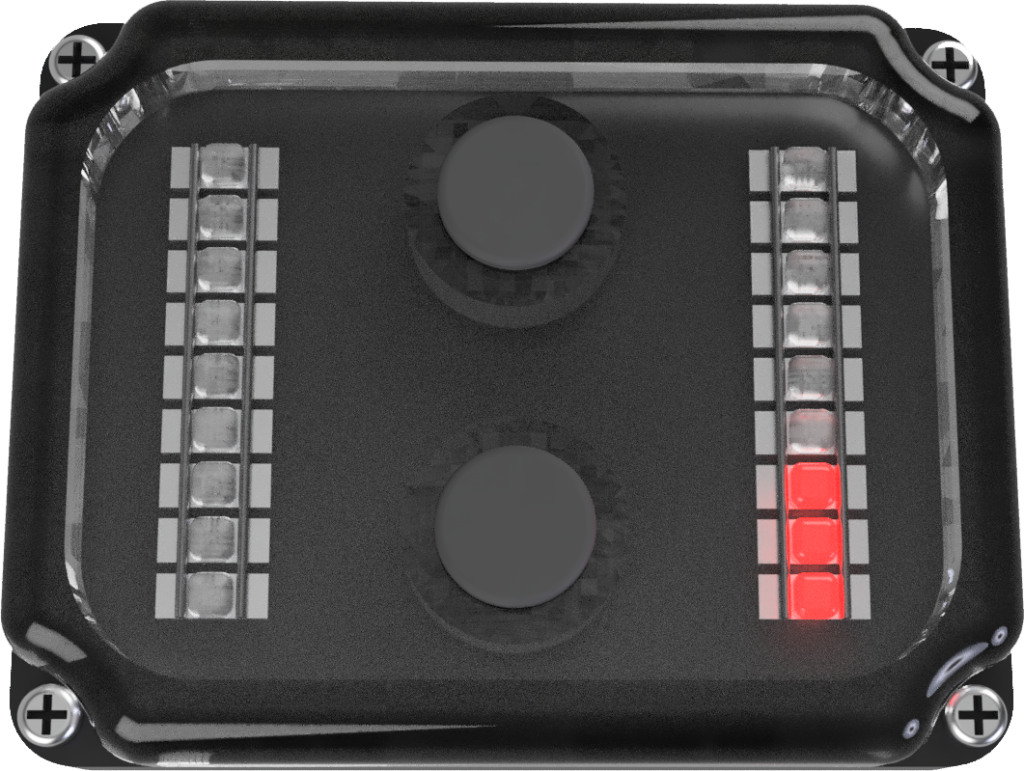
After switching on the scooter under water, the display should look like this:
If you now hold both control triggers (Recreational mode) or one control trigger (Expert mode) pressed, the scooter’s engine will be activated, and the propeller starts to turn.
As soon as you release the trigger(s), the propeller will stop.
While driving, you may at any time change the gear by pressing the upper or lower control button with a thumb. You may also change the gear, while the propeller is stopped.
When you press the control trigger(s), the scooter will start in this new gear.
Automatic reset to gear 0 (Time Lock feature)
For safety reasons, the GO! will reset the currently selected gear automaticly to 0 after 10 seconds of inactivity. This is to avoid any unsafe situations due to unintentional activation of the engine.
If the scooter is in Expert or Freediving mode, simply perform a double click on one control trigger, to resume driving with the last selected gear.
If the scooter in Recreational mode, there is no automatic gear reset.
Double click
If the scooter is in Expert or Freediving mode, you may perform a double click on the unsued control trigger, to do the following:
- When in gear 1-7, accelerate to full speed
- When at full speed, decelerate to the last used gear
- When in gear 0, accelerate to the last used gear (even reverse gear)
Reverse gear
If the scooter is in Expert or Recreational mode, you have a reverse gear at your disposal.
This gear might be useful to stand still in a current coming from behind, or to withdraw from an obstacle in your way.
When in gear 0, press the lower control button to activate the reverse gear:
Bypass
When the scooter is switched on, it performs a self-test to check the communication between the engine control and the display. In case of a communication interruption, the scooter’s engine is automatically activated in gear 4, in order to bring the diver safely home, even when the control buttons or triggers do not function properly.
The bypass feature is available in Expert and Freediving mode.
Capacity dependent power reduction
Depending on the battery capacity left, the GO! will deactivate certain gears, in order to make sure that you will safely return to the starting point of your dive (driving more slowly will increase the scooter’s range).
As an example: If the battery capacity drops below 33 %, you will not be able to in gears above 5.
| Display | Battery charging level |
 | Battery is 99 % charged |
 | Battery is 11 % charged |
Leaving the water with the scooter
Proceed as follows after completing a dive:
- Turn off the scooter using the main switch.
- Secure the scooter by attaching it to the boat ladder or the pier etc. or hand it over to a person helping you. Keep away from the scooter above you (e.g. at a boat).
- Leave the water, drop your diving gear, then, pick up the scooter.
- Maintain the scooter as described in this manual.