| Document level: | Level 0 |
| Scooter models: | All FUTURE / GHOST/ M&S models |
| Document date: | December 20, 2022 |
Procedure information
| Time to complete this procedure: 10-30 min | |
| Tools needed to complete this procedure: – Seacraft service key – Non-dust paper towels – Engine grease – Isopropyl alcohol – Wooden stick fitting the engine shaft (8-10mm) |
Step-by-step instructions
Introduction
In order to provide the fault-free operation of your Seacraft DPV, it is recommended to revise your unit by authorized service center.
However, simple control and maintenance can and should be performed also by the owner. Do not worry, there are not too many operations that should be performed.
In order to ensure that your DPV is in the good shape – just follow the points below. If there are any questions arising about any particular point, do not hesitate to open a service ticket, and describe as detailed as possible your concern.
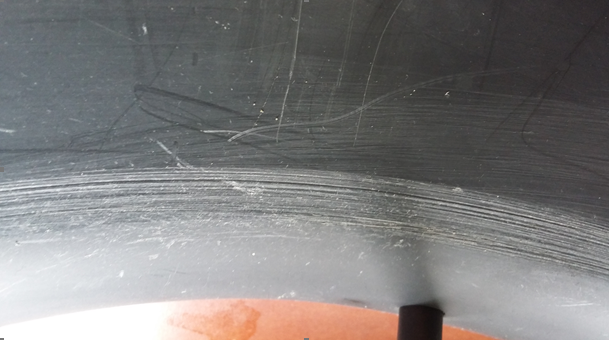
Body, noozle, and cap check
Start with a general inspection of the outside of your DPV.
- Are there any dents in the hull (tube)?
- Is the nozzle not cracked, or damaged?
- Are there no deep scratches located on the DPV aluminum parts?
Handles and triggers check
Start by checking your DPV handles.
- Do the triggers operate smoothly, and are not getting stuck?
- Do each trigger activate the motor when pressed?
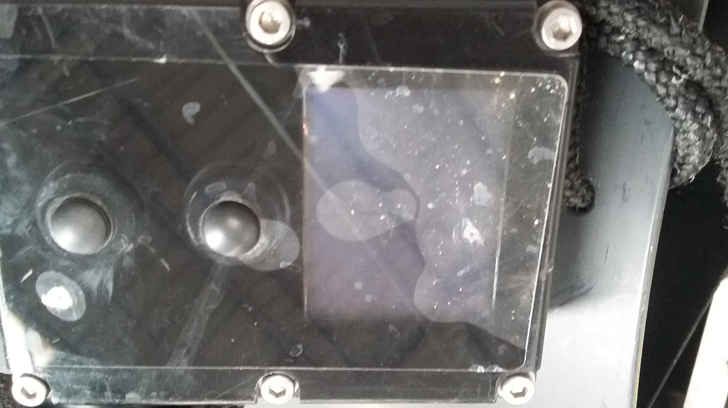
Piezo buttons, covers, and polycarbonate panel
This is a part of the scooter which requires close attention, especially in case of any mechanic impacts.
- Check if both rubber ‘buttons’ are properly attached to the screen
- Check if the screen protecting foil is not damaged or falling out
- Check if there are no cracks visible in the polycarbonate panel. Inspect especially the areas close to the screws. In case of any cracking or damage, there is a risk of flooding the DPV.
Now, check if both buttons are working
- Press the upper and lower piezo button, to ensure that they are changing the gears correctly.
Magnetic propulsion – the heart of scooter
Due to the lack of a propeller shaft, the Seacraft motor is a virtually maintenance-free system. However to ensure its long life-span it is recommended to remember about few simple things.
–> Opening the Seacraft drive system
Remember about keeping your motor correctly greased – this is a good moment to clean out old grease, and apply the new one.
Running the motor without grease can significantly reduce the life time of the thrust bearing- the only part in the Seacraft motor that is considered consumable.
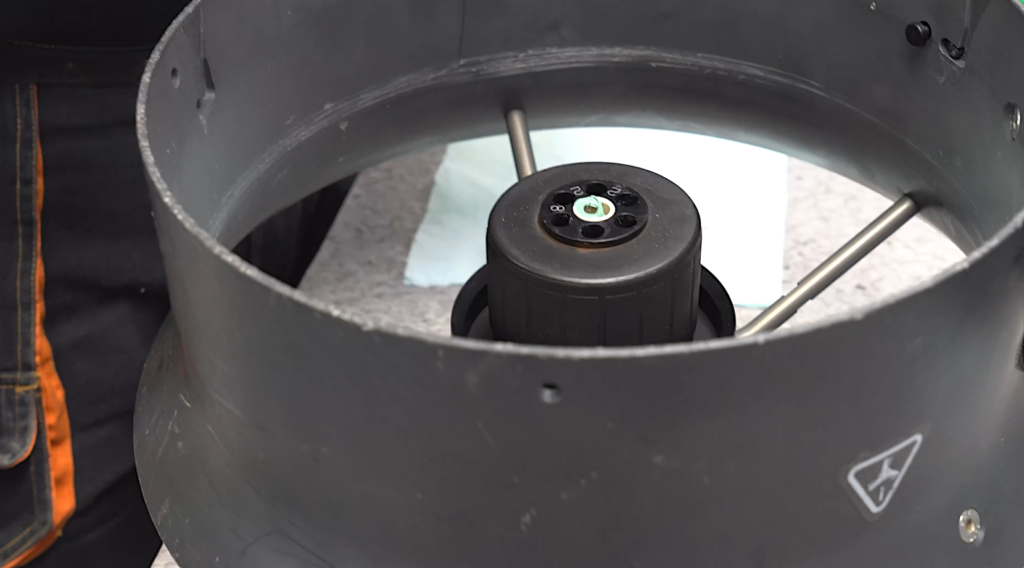
–->Cleaning and greasing of the motor
- Check that the propeller does not rub against the scooter nozzle and that the gap between the screw and the nozzle is similar at each propeller blade. (rotate the propeller by hand)
- Remove the post-swirl stator, and check if the stator’s lock is not protruding/ and closes to the end correctly locking the post-swirl stator
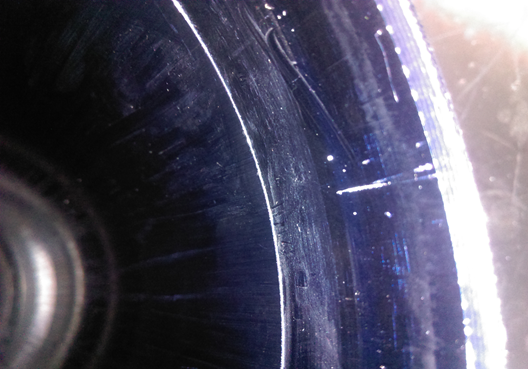
- Remove the propeller. Inspect the internal surface of the rotor (magnetic ring) for damages, uneven surfaces.
- Check the motor surface for scratches, corrosion or other damages. Clean and solid surface ensures motor long life. Even minor damages may start getting worse with time.
- Check the propeller axis tip – there has to be green engine grease on the tip. If it is non, follow the engine greasing procedure.
- Check the propeller for dents and damages. Minor ones can be removed using sharp knife and sandpaper.


Harness control
Harness is transferring all of the DPV power to the diver body. Its failure will render the DPV to be virtually unusable underwater, moreover device can be lost.
- Check the tow harness for damages, or torn parts. If there are any detected- replace the tow cord.
- Check the smoothness of the carabiner work. If it is not smooth, grease it with appropriate oil grease, or replace
- Check the front harness and its carabiner in the same way.
Internal humidity, hours count
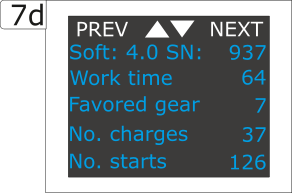
Following the scooter manual, or specific instruction for the given DPV model check:
- What is the internal humidity of the DPV. Unless you operate in a very hot and humid climate, it is usually in 20-60% range. If it is above 80% it can indicate a water ingress inside (and also a warning will be displayed on the screen)
- What is total DPV work time. Depending on the load, every 120-200h of operation, a thrust bearing has to be replaced. This should be done by authorized service point.
Seals and caps control
It is recommended to replace all o-rings, regardless of their look, every 2 years.
Open the DPV cap nut, and charging port cap and:
- Check the caps seals for damages and dirt
- Check the caps internal surfaces for scratches
- Clean and grease the caps seals
- After opening the DPV tube, check the body sealing o-rings, and grease them
- Check the inside surface of the DPV tube, as any scratch of sealing surface may lead to leaks.

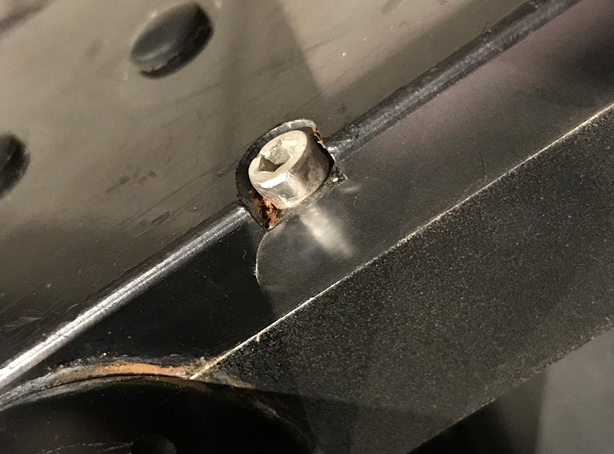
Charging port control
- Check the charging port contacts – they should be shiny and gold. Any green color/oxidation can indicate partial charging port damage. There should be no water or humidity in the charging port.
Internal DPV control
As usually Seacraft DPV does not need to be opened for recharging, it is good to control its internal look at least once per year. See inside after opening the tube and:
- If the elements of the scooter internal structure contain traces of dirt, e.g. salt, they should be wiped with a damp, soft cloth and then wiped dry.
- In the event of traces of moisture condensation, it is recommended to leave the open structure in a dry room (for example- with air conditioning running) for approx. 24 hours.
- Check if the battery is correctly positioned to provide handles-up position (arrow UP or DOWN battery orientation)
- In case of damaged insulation, cable or receptacle linking the battery with the Scooter electronics, disconnect the plug, thoroughly protect the damaged area with insulation tape, and send the scooter to an authorized service center or to the manufacturer.

Final control
Reasseble the DPV, and tighten the caps.
Now, check:
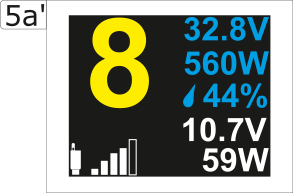
- How do the motor run? Is it silent and smooth, without vibration? The power consumed when DPV is running in RPM engine mode, on gear 9, should not exceed 35W. (this is displayed on the control screen). Higher value may indicate drive system contamination.
- Do the scooter charge properly, to minimum 95% after connecting the charger?
Now, scooter is ready for the next diving season.
There are several new improvements and innovations available for your scooters – and they are reverse compatible with almost all Seacraft DPVs.
Possibly, the break in diving is a good time so send your scooter to the factory, or authorized service point for proper revision and upgrade?
In case of any hesitation or information need about best proceedings with your scooter – contact us.
In case of questions or problems,
do not hesitate to contact us: service@seacraft.eu.