| Document level: | Level 0 |
| Scooter models: | All FUTURE / GHOST models |
| Document date: | May 2, 2022 |
Procedure information
| Time to complete this procedure: 3 min | |
| Tools needed to complete this procedure: – Seacraft DPV tow harness with tensioners – Seacraft DPV front harness (optional) |
Step-by-step instructions
Introduction
DPV tow harness is one of the most important elements of scooter configuration. As it transfers all of the DPV thrust onto a diver, it has to be correctly configured. Our goal is to have as small as possible front- surface of a diver, and direct all of the trust under the diver’s body.
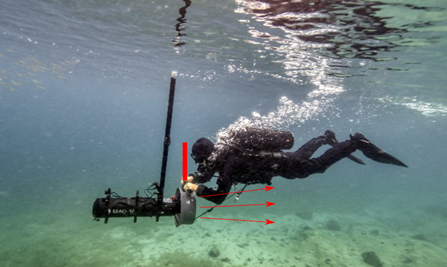
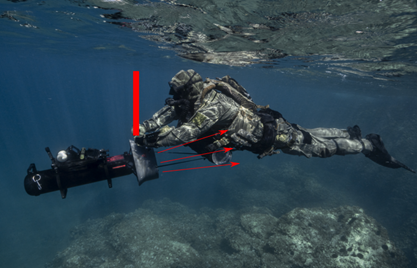
In order to easily adjust the harness to the diver’s size, configuration and preferences, we need to attach it to the DPV as a first thing.
Harness configuration – carabiner options
The first thing that has to be decided, is how the carabiner will be rigged.
First option is to immobilize it using a cow hitch:
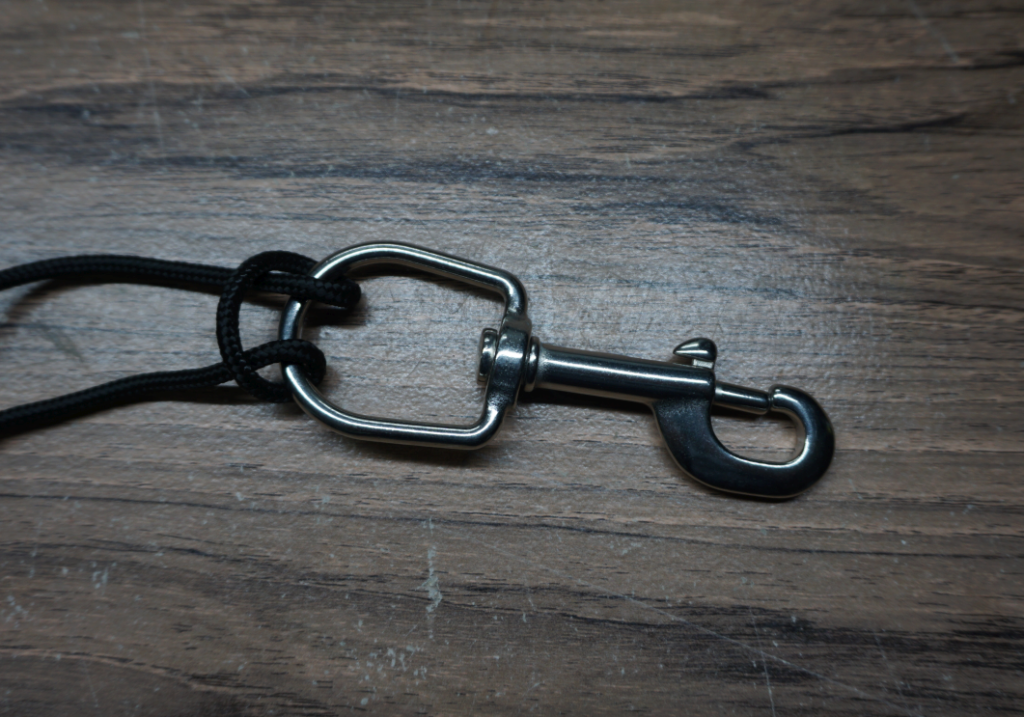
This option is used, only for 12-6 positions, with two tensioners, and expert users.
Other possibility, is a free-moving carabiner:
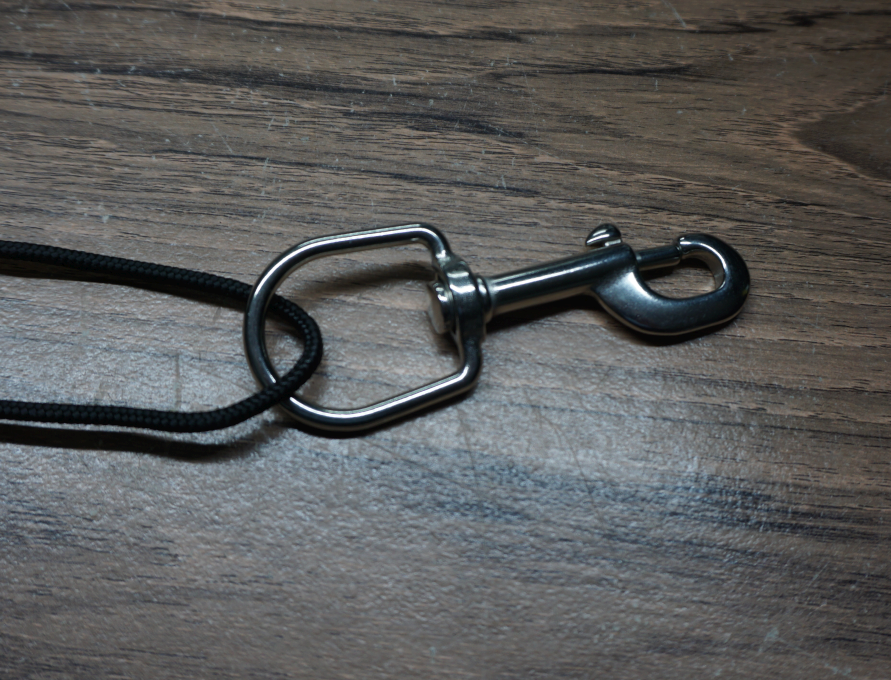
This option is used for 3-9 harness positions, and for less-experienced users.
Harness configuration – orientation on a DPV
There are two possibilities of DPV harness rigging:
a) 3-9 – side harness orientation.
It is recommended for chestmount CCR (counterlung interference). Some users that drive often in narrow spaces (tighter caves) also may prefer this option. For 3-9 setup, the carabiner has to be free.
b) 12-6 – most preferred for heavy load driving, and general usage. Can be used with immobilized, or free carabiner.
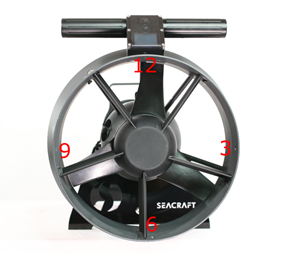
Attaching tensioners, and a harness
Seacraft is providing dedicated tensioners, which facilitate harness length adjustment, and removes any possibility of harness slippage (for example, when towing a partner – popular tension knots may start to slip)
In order to attach the harness, decide on the 3-9 / 12-6 position, and should the clip be immobilized or free. In the below example, we show how to rig a harness in 12-6 position, with an immobilized carabiner.
Thread the cord, as shown below
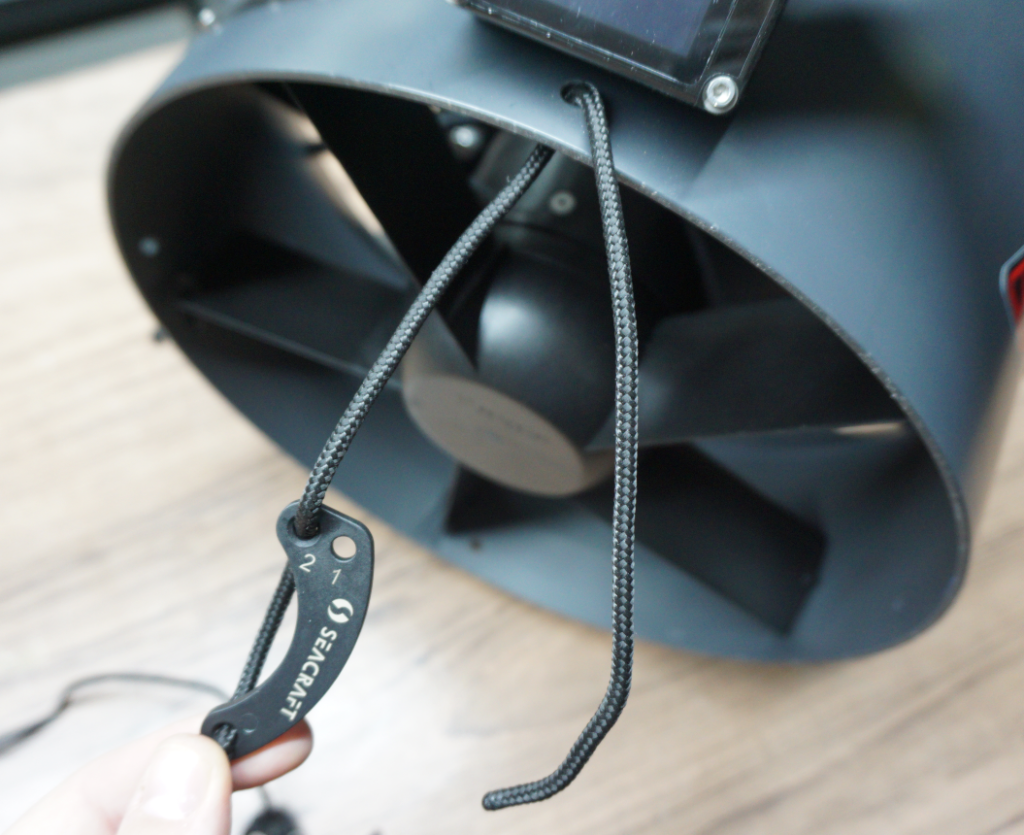
Next, thread the cord as shown below, and tie a simple overhead knot on the end.
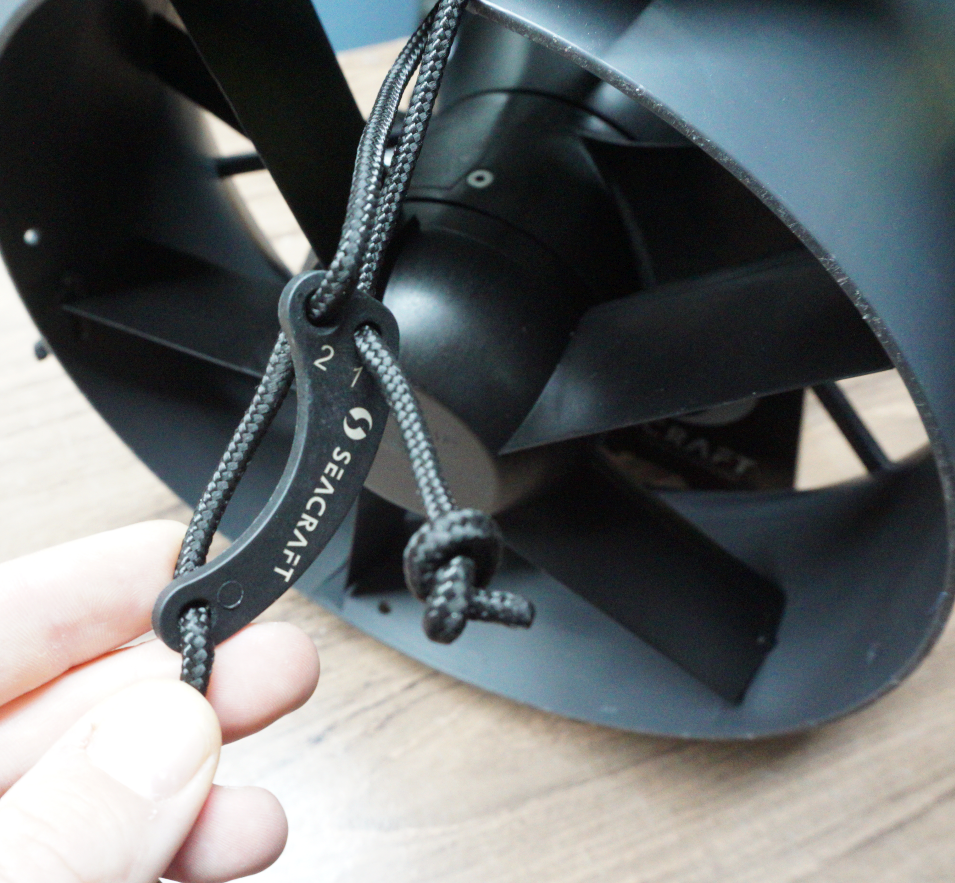
Ensure a min. 1cm of free-end, and tighten it strong.
Repeat the operation with the other harness end. Attached harness should look like as below:
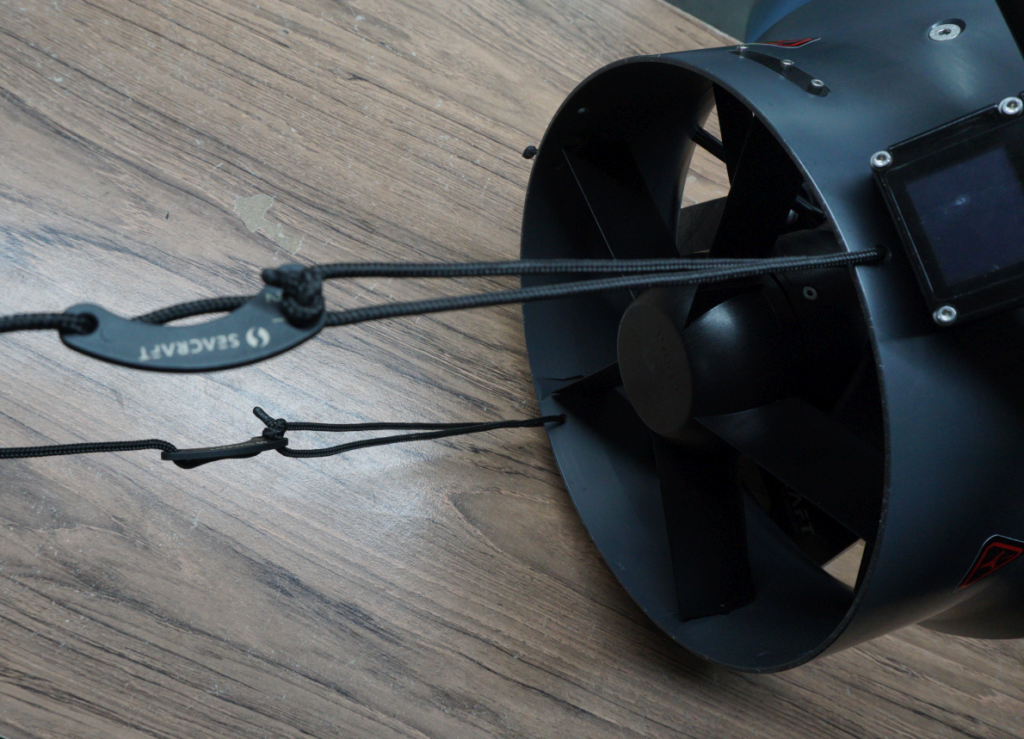
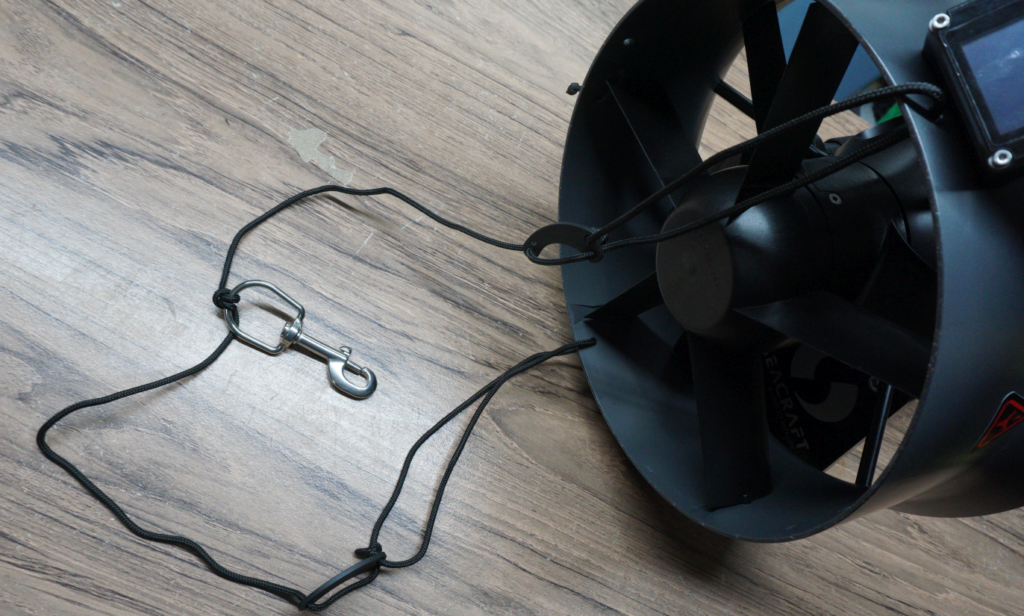
The position of the clip should not require any effort from the diver, to keep the DPV on course.
Front harness
Front harness is used for handling deactivated DPV, backup DPV towing, DPV depositing and some of the emergency towing procedures.
One of it’s rigging method can be seen on the video below:
In case of questions or problems,
do not hesitate to contact us: service@seacraft.eu.

